 |
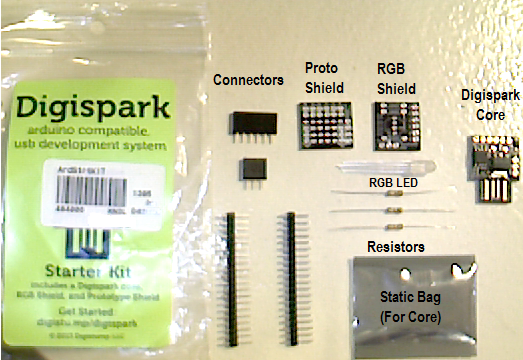
| Digispark Starter Kit from Jason Whiteman's lab in Houston, Texas |
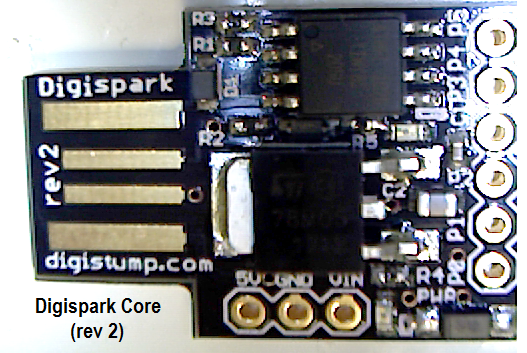 |
| Digispark Core (2nd Revision) included in Starter Kit |
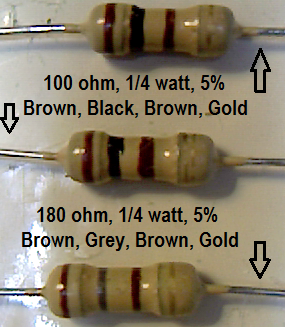 |
| Digispark RGB Shield resistors |
The red LED is using the 180 ohm resistor in order to decrease the current through the red LED. Both the green and blue LEDs have 100 ohm series resistors. Assuming 5V I/O voltage, the red LED sees 23mA (milliamps) and both the green and blue LEDs see 43mA. According to Ohm's law (V=IR), the smaller the resistor the larger the current. Larger currents result in greater intensity (brightness) within the maximum current limits of the part. According to the datasheet, the maximum allowed current is 100mA.
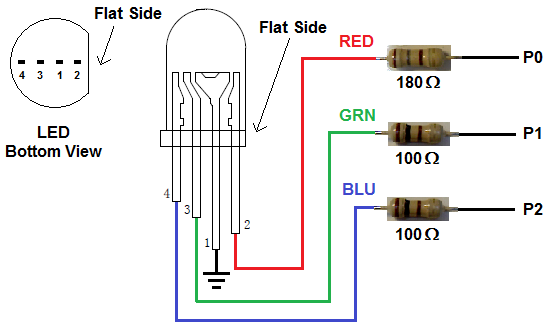 |
| Digispark RGB Shield schematic and pin 1 identification of LED |
The final component is a Prototype Shield which is simply a small board with 40 through-hole connections (pads). Of these 40 pads, 12 are dedicated to the bus between the core and the shield (6 pads are for jumper connector, and 6 pads paired with these 6 jumpers and left open for user connections), 2 pads are dedicated to VIN, 4 pads are dedicated to GND, and 4 pads are dedicated to 5V. This leaves 18 pins for general use.
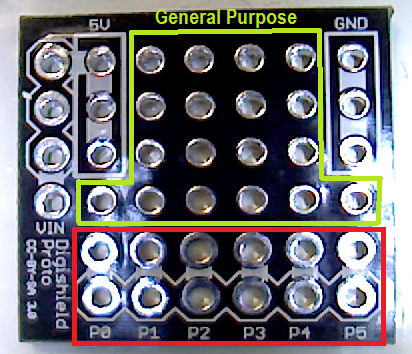 |
| Digispark Prototype Shield showing pad assignments |
At MicroCenter, it is possible to save a dollar by purchasing the RGB shield and Digispark core separately. However, I elected to purchase the Starter Kit in order to get the Prototype Shield. Although it is unlikely I will actually use the prototype shield, the extra "tax" for including it was worth the charge.
For more information, reference relevant datasheets.
 |
| Atmel Tiny85 (ATtiny85) |
1. Atmel ATtiny85 Datasheet
2. ATtiny85 does not natively support USB. Find out more about the USB implementation through software/firmware:
USB Implementation (Software)
Note: USB speed is low-speed mode (1.5 Mbit/s) of USB2.0
3. Complete list of documents for ATtiny85
4. The following datasheet, although perhaps not the exact manufacturer, matches the RGB LED used in the Digispark kit. RGB LED Datasheet
5. Although this blog has a hardware focus, in order to get started using the Digispark core, you will have to familiarize yourself with the software and PC interface. All of this information can be found on the WIKI site: Digispark WIKI
Good luck developing your own Digispark solutions. Perhaps in the future, this blog will be updated with specific applications of the Digispark starter kit.
No comments:
Post a Comment